
On an iPhone, go to Settings, then Apps, then Phone, then Call Forwarding and enter the destination number in full international format; on a GSM or CDMA line, use the carrier code instead if the menu is missing.
Maybe you're leaving your work phone at home, covering a colleague's client calls, or moving conversations to a service that documents them. You want callers to keep using the number they already know, without wondering which device you're carrying.
That's the useful distinction: your public number stays the same while the receiving destination changes. Getting it right means more than turning on a switch. You need the correct carrier instructions, a successful test call, and a clear understanding of what happens to caller ID and private information.
Table of Contents
- Carrier Codes and Settings at a Glance
- Step-by-Step Setup on iPhone and Android
- How to Test Forwarding Before You Rely on It
- Caller ID and What the Other Person Sees
- Privacy and Access When Calls Are Redirected
- Turn Off Forwarding and Confirm the Change
Carrier Codes and Settings at a Glance
| Network or menu | Activate | Deactivate | Notes |
|---|---|---|---|
| Verizon-type CDMA | Dial *72 then the destination number | Dial *73 | Use the carrier-confirmed sequence and confirm with a test call |
| AT&T and many Canadian GSM networks | Carrier-confirmed *21*destination# pattern | Confirm whether ##21# applies to your line | Use full international format when supported |
| T-Mobile | Obtain the activation sequence for your line | Obtain the matching cancellation sequence | Syntax differs, so check with the carrier |
| iPhone menu on a GSM line | Settings > Apps > Phone > Call Forwarding | Turn the toggle off | Needs cellular signal during setup |
The code depends on your network, not just your phone. The EazyAgent carrier-code guide describes Verizon-type *72 activation and *73 cancellation, alongside the *21*destination# pattern used by AT&T-style and many Canadian GSM implementations. Treat these as carrier-specific patterns, not universal commands.
GSM and CDMA are network-family labels you may encounter in forwarding instructions. You don't need to diagnose the radio technology yourself. Give your carrier your phone model and line details, then ask which activation and cancellation methods apply.
Choose a menu or a dial code
The iPhone menu is easier to inspect because you can see the saved destination. Some CDMA lines instead require carrier-specific activation. If the menu is missing, repeatedly searching Settings won't fix a service that needs carrier provisioning.
For a dial code, use the native Phone keypad, place the call, and wait for network confirmation. Enter the destination in full international format where supported, but follow the carrier's required number format rather than forcing a plus sign into an incompatible sequence.
Practical rule: Save the matching cancellation instructions before enabling forwarding.
If a team needs scheduled routing rather than a temporary redirect, CloudOrbis Inc.’s guide to VoIP calling for clinics and manufacturers offers context for comparing a broader phone system with carrier forwarding.
Check your mobile plan, too. Without call forwarding included, your carrier may charge extra fees. We advise adding it to the plan when needed, since it's usually inexpensive.
Step-by-Step Setup on iPhone and Android
Set forwarding on the line whose incoming calls you want to redirect. Have the destination number ready to paste, and make sure whoever receives those calls knows they're coming.
The device paths below are the starting points. Networking2000's guide on how to set up call forwarding is another useful walkthrough when you're matching instructions to a handset menu.
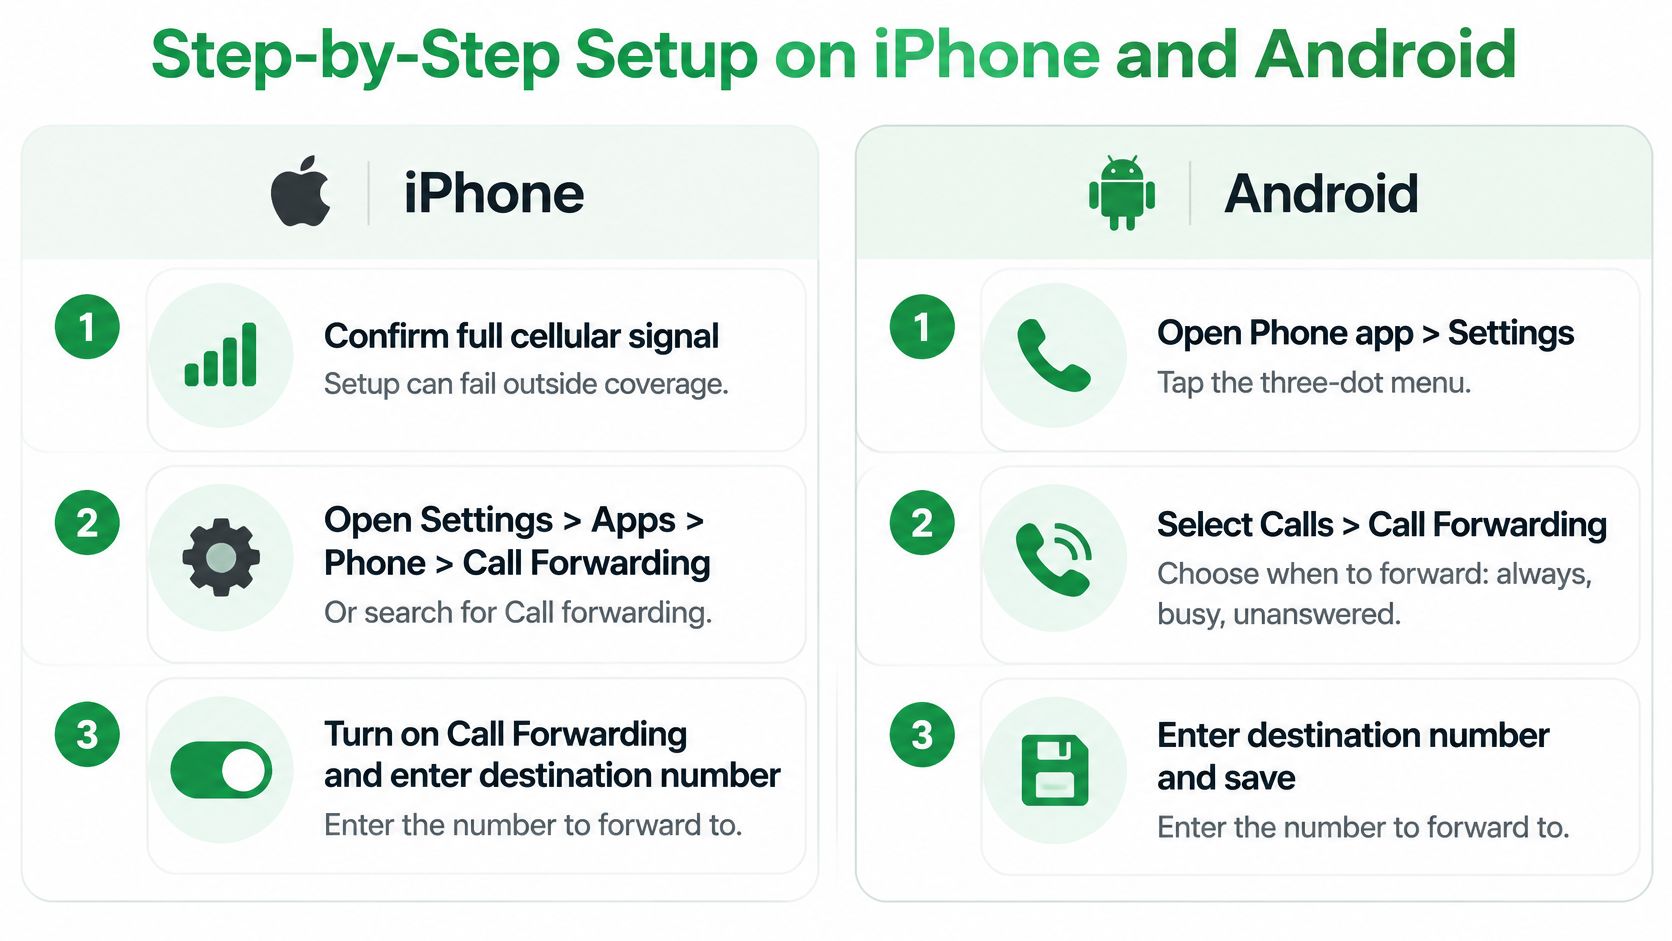
Set up an iPhone
Check cellular coverage. Make sure the phone is connected to its cellular network before changing the setting. Wi-Fi access alone isn't a substitute for the cellular connection used to configure forwarding.
Open the forwarding controls. Go to Settings > Apps > Phone > Call Forwarding, or search Settings for Call forwarding. If your phone asks which line to use, select the public number you want to redirect.
Turn on Call Forwarding. Enable the switch and open Forward To. Don't assume switching it on replaces an old destination that may already be saved.
Enter the receiving number. Paste the complete destination, including the plus sign and country code where supported. Check the digits against the original, especially if you copied the number from an email or message.
Go back to save. Return to the previous screen, then reopen the destination field to inspect it. Leaving immediately after typing can leave you unsure whether the new number was saved.
Use this visual as a checklist while working through your device's controls.
Set up an Android phone
Open the Phone app. Tap its three-dot menu, then choose Settings or Call settings. Use the app you normally dial calls with, not a messaging app.
Find Call forwarding. Some manufacturers place it under Calls or Supplementary services. Match the wording rather than expecting every Android phone to show an identical path.
Choose Always forward. This redirects incoming calls without first waiting for your phone to go unanswered. Don't select a busy or unanswered option unless that's the behavior you want.
Enter the destination. Paste the receiving number and inspect it before continuing. A missing country code or incorrect digit can produce a failed setup or send calls somewhere unintended.
Tap Enable or Turn on. Wait for the screen to update, then inspect the saved destination. Merely entering a number without enabling the rule isn't enough.
A configured phone should show the intended destination and an enabled forwarding setting. On iPhone, look for the forwarding status icon as well. Those signs show configuration, not proof that a caller can reach you.
How to Test Forwarding Before You Rely on It
A successful inbound call is the proof that matters. A switch can look correct while calls still reach the wrong voicemail, fail under a particular condition, or never arrive at the destination.
Apple's call-forwarding instructions distinguish GSM menu controls from carrier-dependent CDMA setup, require cellular coverage during configuration, and describe the forwarding status icon. Use that guidance to check the setup method before troubleshooting the receiving phone.
Use this checklist after activation, with a calling line that isn't connected to your own accounts.
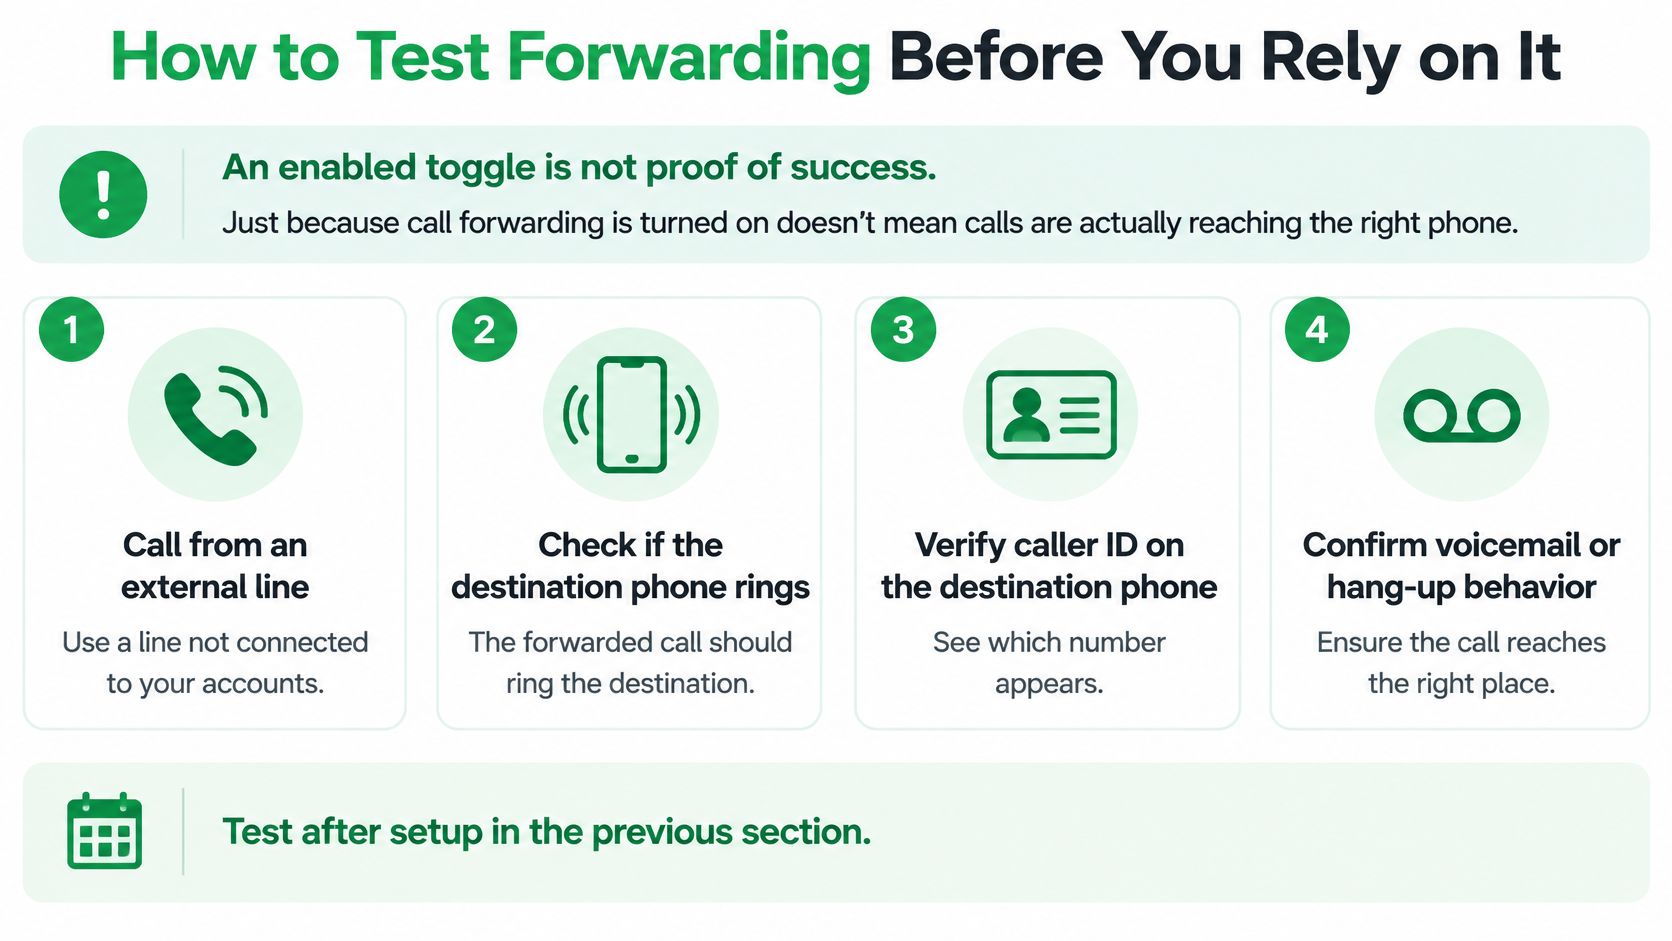
Prove each intended routing condition
Start by confirming the line type and activation method with the carrier. Verify the destination while connected to cellular service, then call your public number from the independent line.
Test each condition you intend to use separately:
- Unconditional forwarding: With forwarding set to send all calls onward, confirm the destination rings without requiring you to ignore the original phone.
- Unanswered forwarding: With the appropriate conditional rule enabled, leave the original phone unanswered and check where the call goes.
- Busy forwarding: Test while the original line is engaged. If call waiting intervenes, ask the carrier how to create a valid busy-line test.
- Unreachable forwarding: Make the original phone unavailable to the cellular network, then check whether the intended destination receives the call.
Don't expect a conditional test to prove anything while an unconditional rule is overriding it. Ask the carrier which rule is active and how to isolate each condition.
A passing test for one routing condition doesn't prove that the others are configured.
Keep evidence you can troubleshoot
Record the originating number, public number, destination, activation time, carrier, condition tested, and result. Note whether the destination rang, whether audio worked in both directions, and where an unanswered call ended.
For an on-screen demonstration alongside your own checks, use the video below.
If activation returns an error, the menu is missing, or calls reach voicemail instead, contact the carrier with that log. Give the failed condition explicitly rather than reporting only that forwarding doesn't work.
Before relying on the setup this week, complete the inbound test, check unanswered-call behavior, and verify that cancellation restores the original route. Repeat the full validation after a SIM change, number port, iOS update, or plan change.
Caller ID and What the Other Person Sees
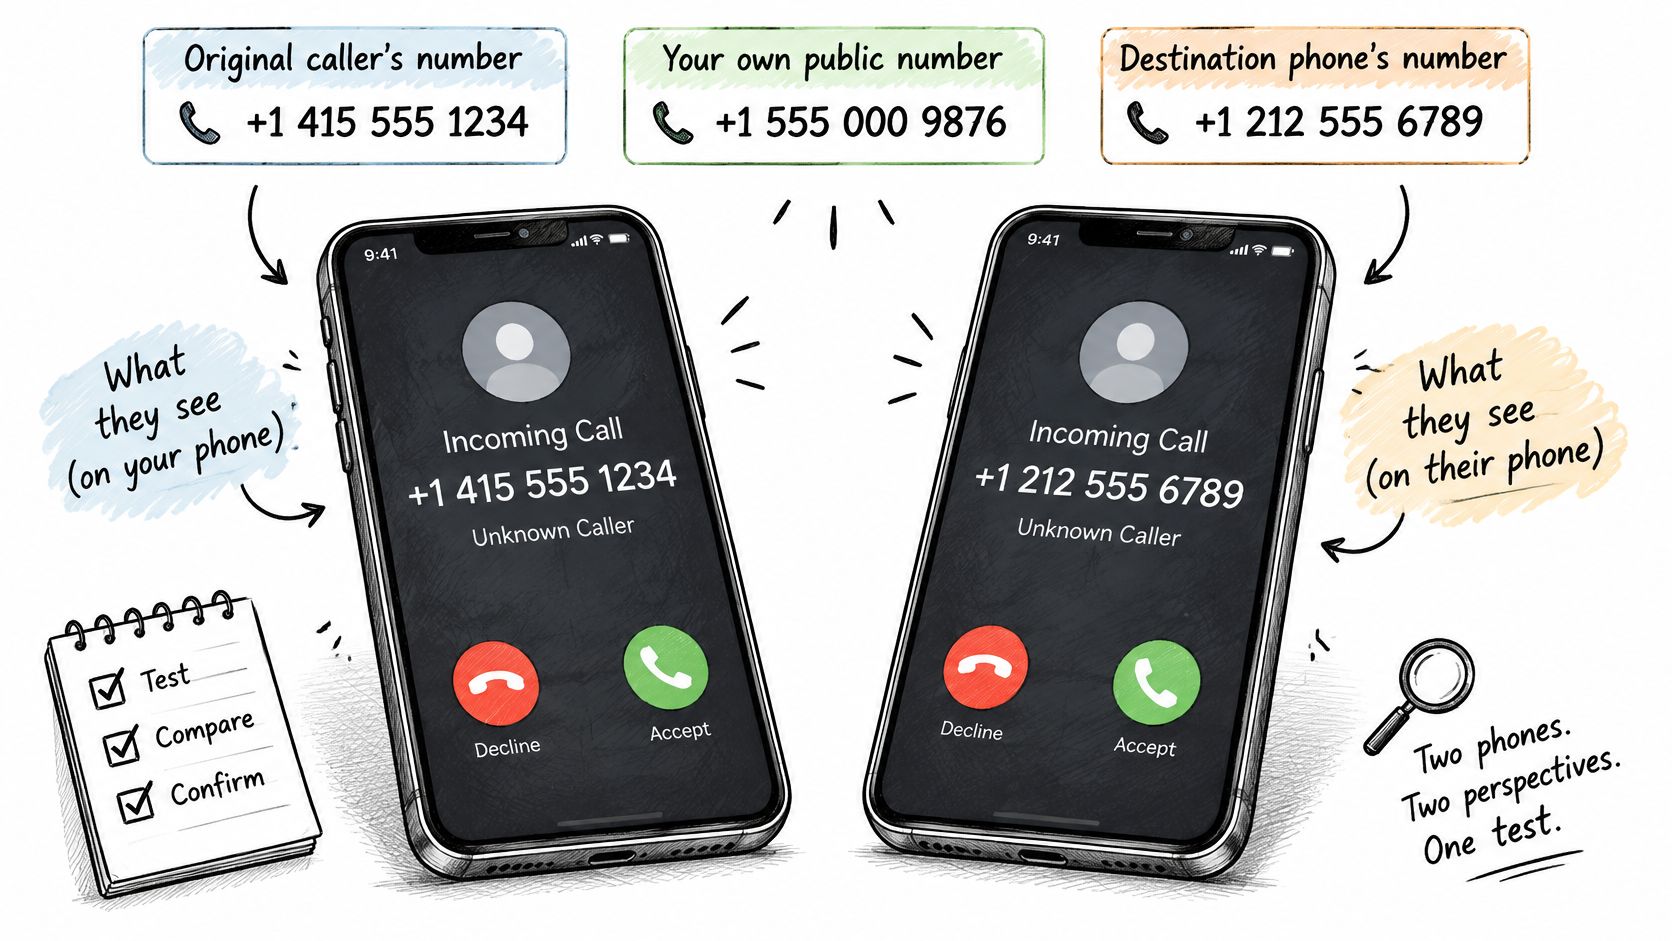
Keep these identities separate: the original caller's number, your public number, and the destination phone's number. They aren't interchangeable, and forwarding an incoming call doesn't automatically make an outgoing callback use your public number.
A destination may display the original caller, the forwarding number, or another service identifier. Check the actual display instead of assuming it behaves like a direct call.
The diagram highlights why you need to inspect both ends of the conversation.
Run an inbound and callback check
Use independent calling and receiving phones, with your public line as the number being redirected.
- Inbound display: Call the public number from the outside phone. Write down exactly what appears on the destination screen.
- Callback identity: Return the call from the destination using the method you'll use for clients. Record the number the outside phone sees.
- Return path: Call that displayed number back and check which phone or service answers.
- Spam treatment: Note any warning, silenced ring, or blocked call rather than recording only whether the call connected.
A callback from a personal receiving phone may expose that phone's number. Tell clients which number to save, and don't promise a consistent business identity until you've tested the outgoing method.
With our setup, incoming calls are captured automatically after forwarding is connected. For outgoing calls, dial from the VoxNote app so your client still sees your own number.
Separate display from trust
The FCC's caller-ID spoofing guide explains that scammers can falsify displayed numbers, including familiar local numbers and trusted organizations' numbers, and that carriers may use analytics to label or block calls. Include spam-label checks in your test because a legitimate call can still be treated as suspicious.
Caller ID isn't authentication. If someone requests money, account details, or a callback to an unfamiliar number, end the call and verify through a separate, known channel.
Privacy and Access When Calls Are Redirected
When you forward calls to another phone, you also change where client information can be seen. A shared handset may expose call logs, voicemail previews, contact names, and notifications to someone who never had access to your primary phone.
The FCC's telephone privacy guide explains that providers collect call-related information, including numbers called, timing, and use of forwarding or voicemail. It also describes permitted uses and disclosures, including service provision, customer approval, and legal requirements.
That makes the carrier account part of your privacy setup. Understand who can change routing, what account permissions apply, and whether permission for relevant information-sharing is opt-in or opt-out.
Follow the information beyond the handset
A redirected conversation can leave records in more places than the receiving phone. Consider voicemail transcription, email notifications, call documentation, and any shared workspace used to store the conversation.
If you use Trefle.ai alongside your workflow, review the privacy terms before placing client information there. Treat every additional service as a separate access decision, not as an automatic extension of your phone's permissions.
Forwarding also isn't a substitute for considering recording and consent. Our guide to recording conversations on iPhone addresses that separate part of call documentation. Other users of our service who took part in the same call may access its shared call record; organization membership alone doesn't make every private call available to every member.
Access check: Identify who can see the call record, not only who can answer the phone.
Complete a privacy checklist
- Confirm account control: Identify the carrier account holder and everyone authorized to change forwarding.
- Secure shared devices: Restrict access to call logs, voicemail, and lock-screen notifications.
- Inspect transcription settings: Check where voicemail text and conversation notifications are delivered.
- Separate contacts: Keep personal and client information distinct where practical.
- Plan for loss or departure: Name the person responsible for disabling routing to a lost phone or former team member.
- Reject unexpected requests: Never give account numbers, passwords, or PINs to an unexpected caller.
Before activation, answer this plainly: who can see the redirected calls, and what will you do if the receiving phone disappears?
Turn Off Forwarding and Confirm the Change
Turn forwarding off through the control you used to enable it, then test the result. Don't treat an empty destination field or a dismissed confirmation message as proof that calls have returned to your phone.
Remove the active rule
- On iPhone: Open Settings > Apps > Phone > Call Forwarding and turn the toggle off.
- On Android: Open the Phone app's forwarding settings, select Always forward, and disable it.
- With a carrier code: Use the matching deactivation sequence from the carrier-code table, following the instructions confirmed for your line. Wait for the network response rather than hanging up immediately.
If you also enabled busy, unanswered, or unreachable rules, inspect those separately. Turning off the all-calls setting doesn't establish that every other routing condition has been removed.
You can answer forwarded calls as you normally would, with no noticeable difference, and disable forwarding anytime. The important part is making sure the network accepted the change.
Verify the restored destination
Call your public number from an external line while the original phone is available. Confirm that your original phone rings and can complete the call, rather than checking only that the former destination stayed silent.
Then leave a test call unanswered. Listen to the greeting and check that the message reaches the mailbox you intend to use. This catches a different problem from the basic ringing test: calls returning to your handset but missed calls still ending somewhere unexpected.
If the old destination continues receiving calls, stop changing unrelated settings. Record the time of the failed cancellation, the confirmation received, and the test outcome, then ask the carrier to inspect the active forwarding rules.
Keep forwarding active for a defined purpose, with a named person responsible for turning it off.
Decide whether to keep the route
Temporary coverage during travel or a focused work period needs a clear end point. A continuing call-documentation workflow needs a stable destination and an owner who understands how to maintain it.
For a client-facing phone, add a monthly calendar reminder to inspect the routing state and make an external test call. When forwarding should be off, confirm the status icon has cleared where your device displays one. Review the arrangement whenever you change phones, SIM cards, or plans.
The public number is the part clients remember. Keep control of where it sends them, who receives their information, and how you restore the original route.
VoxNote uses call forwarding to capture incoming conversations on your existing number and turn them into transcripts, summaries, and follow-up drafts. Visit VoxNote to explore connecting your number, then test the incoming route and outgoing caller ID before using it for client calls.